A Safe Alloy Wheel Cleaning Routine Checklist For First Time Readers
A practical step-by-step guide to a safe alloy-wheel cleaning routine checklist for first-time readers, including preparation, instructions, common issues, tips, and next steps.
A Safe Alloy Wheel Cleaning Routine Checklist For First Time Readers
This guide provides a calm, step-by-step routine for cleaning alloy wheels safely, ideal for first-time readers. It covers necessary preparation, the correct order of actions, and practical checks to avoid damage. The routine emphasizes using gentle techniques and the right tools, even for road wheels with typical brake dust. By following this checklist, you'll maintain your wheels' appearance and structural integrity without professional help. The guide also includes troubleshooting for common issues and advanced tips for long-term care, ensuring your wheels stay in top condition.
Fast Answer
- Start by rinsing the wheels with water to loosen dirt, then use a dedicated wheel cleaner with a soft brush on a cool surface. Work in small sections and rinse thoroughly to avoid soap residue.
- Dry the wheels with a microfiber towel to prevent water spots, then apply a protective wax or sealant to make future cleaning easier and shield against brake dust.
Before You Start
- Wait until the wheels are cool to the touch. Cleaning hot wheels can cause cleaning products to dry too quickly, leaving streaks, or cause thermal shock that may warp or crack.
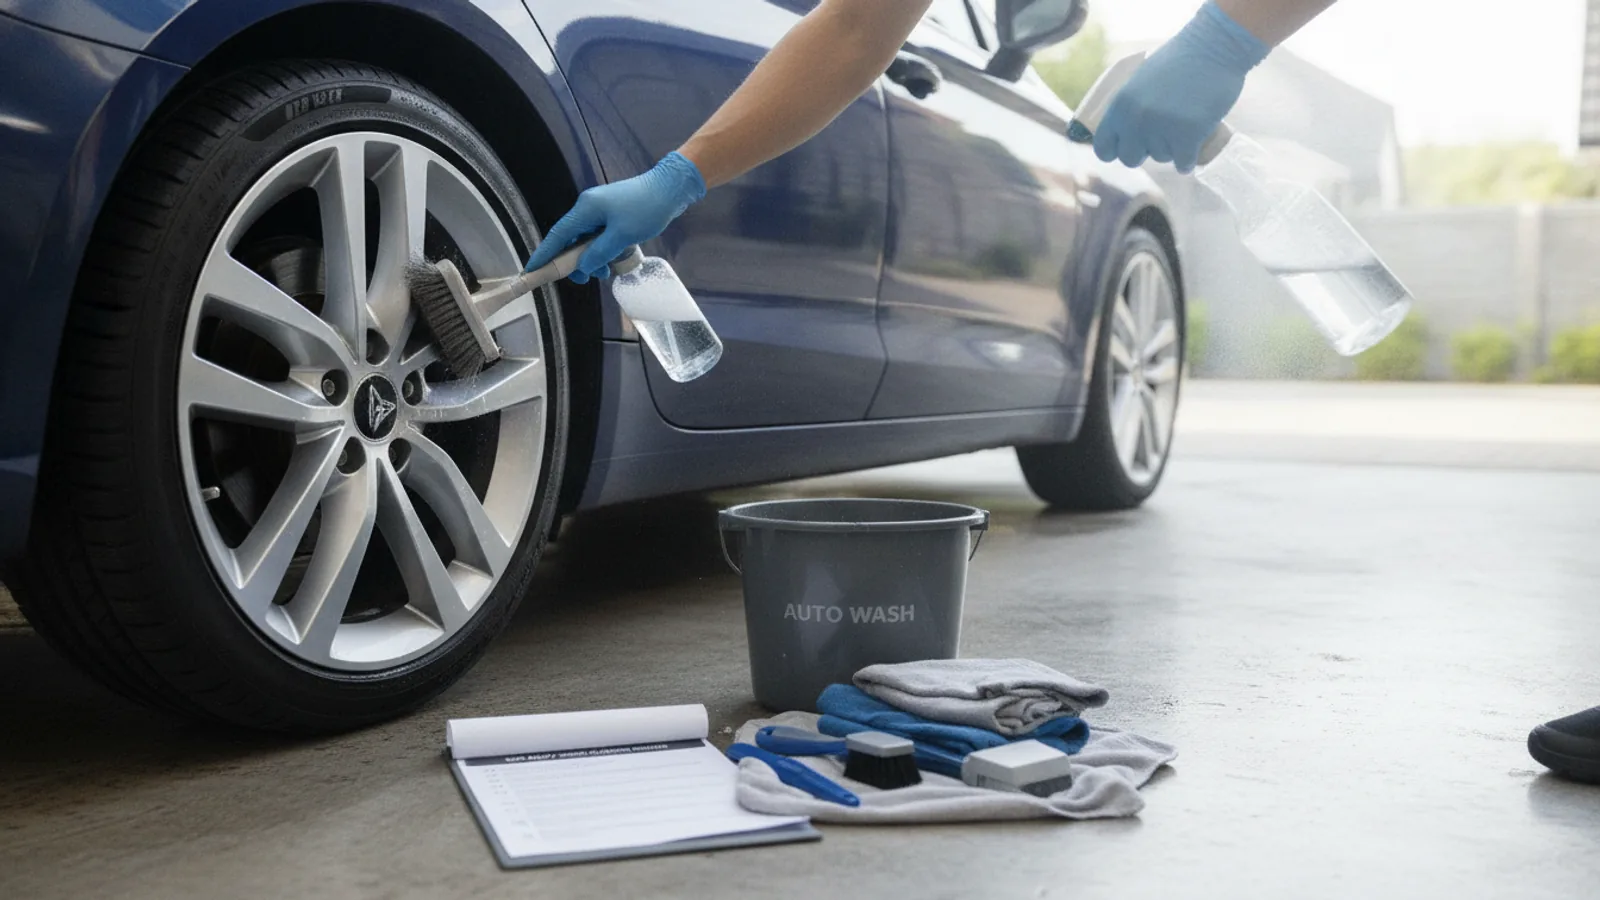
- Gather supplies: a bucket, pH-neutral wheel cleaner (safe for all wheel finishes), a soft-bristled brush (like a wheel brush), a separate mitt or cloth, and clean microfiber towels.
- Move the car to a shaded area to avoid direct sunlight, which can dry cleaning agents too fast and leave residue.
- Perform a quick water rinse to remove loose dust and debris from the wheels, which helps prevent scratching when you start scrubbing.
Step-by-Step Instructions
Initial Rinse and Spray Cleaner
Begin by giving the wheel a thorough rinse with a steady stream of water from a hose or pressure washer set to a gentle setting. This washes away loose dust, brake dust particles, and road grit that could scratch the metal when you touch it. Then, after the wheel is wet, spray your chosen wheel cleaner generously from the top of the wheel, covering the face and barrel as much as possible. Make sure to read the product instructions for any dwell time—usually a few minutes—but do not let it dry out. While it sits, the cleaner works to break down brake dust and grime chemically, reducing the need for aggressive scrubbing. This step is crucial because starting with a layer of loose dirt would turn your scrubbing into an abrasive action, causing fine swirl marks.
Scrub the Wheel Face and Barrel
Take a soft-bristled brush and gently scrub the wheel's face, starting from the center cap and working outward in circular motions. Pay attention to the spokes and the area near the lug nuts where brake dust accumulates. Use extra care around any logos or delicate areas. Then, using a separate brush or the same one if it reaches, clean the inner barrel by reaching through wheel spokes. Keep the brush soaked with cleaner or water to provide lubrication. After scrubbing, rinse the wheel thoroughly to remove all loosened grime and soap. This step is critical because skipping the barrel allows brake dust to bake on, leading to corrosion over time. The specific order from center to edges prevents pushing dirt into the center, and checking each area ensures no residue remains.
Rinse Thoroughly and Check for Spots
After scrubbing, use a strong but wide spray to rinse the entire wheel, ensuring you wash away all cleaning product and any loosened dirt. Pay close attention to the gaps between spokes and inside the lug nut holes. Then, visually inspect the wheel: look for leftover suds, dirty water streaks, or any remaining spots of brake dust. If you see a clean, uniformly wet surface, you've done a good job. If any speckles remain, you may need to spot-clean with the brush again. Remember to rinse the wheel arches and the underside, as cleaner can drip there. This thorough rinse prevents residue from drying on the surface, which could leave water spots or a film that dulls the finish.
Dry the Wheel to Prevent Water Spots
Using a clean, dry microfiber towel, gently dry the wheel as soon as possible after rinsing. Start from the center and work outward, patting or lightly rubbing the surface. If you have compressed air available, you can blow out water from tight crevices, like around the lug nuts, but a towel works fine. Pay special attention to the inner barrel and any recessed areas where water pools. Drying quickly prevents mineral deposits in water from etching the surface as they dry, which cause hard water spots. This step is essential because water spots can be difficult to remove without a polish, so a few extra minutes of drying saves significant effort later. Check that all visible water is gone, and if you see any streaking, go over it again with a fresh section of towel.
Inspect and Clean the Wheel Wells
Take a moment to look at the metal wheel well behind the tire. This area also collects brake dust, mud, and grime. If it's dry, you can use a damp cloth or a brush with a bit of cleaner to wipe it down. Be careful not to disturb the brake components. Rinse the well with water, but avoid spraying directly onto the brake discs to avoid any cleaner residue. This step is often overlooked, but a clean wheel well not only looks better but also helps you spot leaks or worn parts earlier. Checking this area after cleaning gives you a chance to notice any cracks or rust on the wheel itself, which might indicate a problem. Doing this regularly keeps the undercarriage cleaner, which can prevent corrosion.
Apply Protective Wax or Sealant
Once the wheel is fully dry and clean, apply a thin layer of wheel-specific wax or sealant. Use a foam applicator pad to spread it evenly over the face and into the spokes. Let it cure to a haze as per the product instructions—usually a few minutes—then buff it off with a clean microfiber towel. This coating creates a barrier that makes future cleaning easier because brake dust and dirt stick less. It also adds a layer of protection against UV rays and mild chemical exposure. If you apply it regularly, you'll find that a simple rinse often removes most dirt. This step is optional but highly recommended because it protects your wheels and keeps them looking like new for longer.
Quick Reference
| Situation | Action | Why it helps |
|---|---|---|
| Brake dust is caked on and won't come off with a regular wash. | Spray a dedicated wheel cleaner, let it sit for 3-5 minutes, then scrub with a soft brush in small circles. Rinse thoroughly and repeat if needed. | Dedicated cleaners break down baked-on brake dust without excessive scrubbing, which protects the clear coat. |
| You see water spots after the wheels have dried in the sun. | Mix a 1:1 solution of white vinegar and water, apply with a microfiber towel, let it sit for a minute, then rinse and dry immediately. | Vinegar dissolves mineral deposits that cause spots, but it must be rinsed off to avoid leaving an acidic residue. |
| The wheel has a slight film or dull appearance after washing. | Use a pH-neutral wheel soap with a microfiber wash mitt, then rinse and apply a fresh layer of sealant. If the film remains, use a clay bar on the wheel surface. | A film can be old wax or grime buildup; a gentle clay treatment removes embedded contaminants without scratching. |
Common Issues
- Wheel cleaner dried on the wheel before scrubbing.: Rinse immediately with water, then reapply cleaner to damp or wet wheel and work one section at a time. If the cleaner has dried, you may need to wash with mild soap and water first.
- Scratches appear after washing.: Use only soft brushes and dedicated wheel mitts; avoid using abrasive pads or brushes with metal bristles. If scratches are light, a polish may help, but deep ones may require professional repair.
- Stubborn brake dust buildup over time.: Use an iron-removing spray specifically for brake dust, as it dissolves embedded particles. Follow up with a clay bar treatment to remove remaining residue, and then apply a sealant to prevent future buildup.
Advanced Tips
- Consider applying a ceramic coating specifically for wheels, which provides a durable semi-permanent barrier against brake dust and makes cleaning much easier.
- Use a soft, long-bristled brush for inner barrel cleaning that can reach behind the spokes; regular carwash brushes may be too stiff and cause scratches.
- Every few months, remove the wheels and give them a thorough hand cleaning on the inside, using a fine clay bar to remove bonded debris before polishing if needed.
Final Checklist
- Ensure the wheels are cool and in the shade before starting any cleaning.
- Have all supplies ready: pH-neutral cleaner, soft brush, mitt, and microfiber towels.
- Rinse the wheel thoroughly before applying any cleaner to loosen dirt.
- After cleaning, dry completely and apply a protective wax or sealant to finish.
FAQ
Can I use dish soap to clean alloy wheels?
It's best to avoid dish soap because it's often too harsh and can strip existing wax or sealant. It also has degreasers that might remove the wheel's clear coat over time. Instead, use a pH-neutral wheel cleaner that is specifically designed for paint and metal surfaces. Always check the product label to ensure it's safe for alloy wheels.
How often should I clean my alloy wheels?
The frequency depends on driving conditions. For normal city driving, a weekly or bi-weekly cleaning helps prevent brake dust from baking on. If you drive on salt-treated roads or heavy mud, you may need to clean more often. A simple rinse with water every few days can also help. You'll know it's time for a full cleaning when you see dust overlapping.
Is it necessary to wax alloy wheels?
Waxing is not mandatory but highly recommended because it adds a layer of protection against brake dust, environmental contaminants, and UV rays. It also makes future cleaning easier, as dirt doesn't bond as strongly. Use a wax or sealant that is safe for wheels, and reapply every few months or as the product recommends. It's a small effort that pays off in preserving the appearance.