Common Mistakes When Planning A Safe Alloy Wheel Cleaning Routine
A practical step-by-step guide to common mistakes when planning a safe alloy-wheel cleaning routine, including preparation, instructions, common issues, tips, and next steps.
Common Mistakes When Planning A Safe Alloy Wheel Cleaning Routine
Cleaning alloy wheels seems straightforward, but many enthusiasts accidentally damage their wheels or compromise safety by overlooking key steps. This guide explains the most common planning mistakes—such as using the wrong products, ignoring brake dust acidity, cleaning hot wheels, and neglecting wheel well protection—and provides a structured routine to avoid them. You'll learn proper preparation, safe techniques, and post-cleaning care to keep your alloys looking great and structurally sound. Whether you're a beginner or a seasoned detailer, this guide helps you build a thoughtful, safe cleaning plan that protects your investment and your safety.
Fast Answer
- Always clean wheels when they are cool to the touch, and rinse thoroughly before applying any cleaning product to avoid baking dirt into the surface and causing chemical reactions with hot metal.
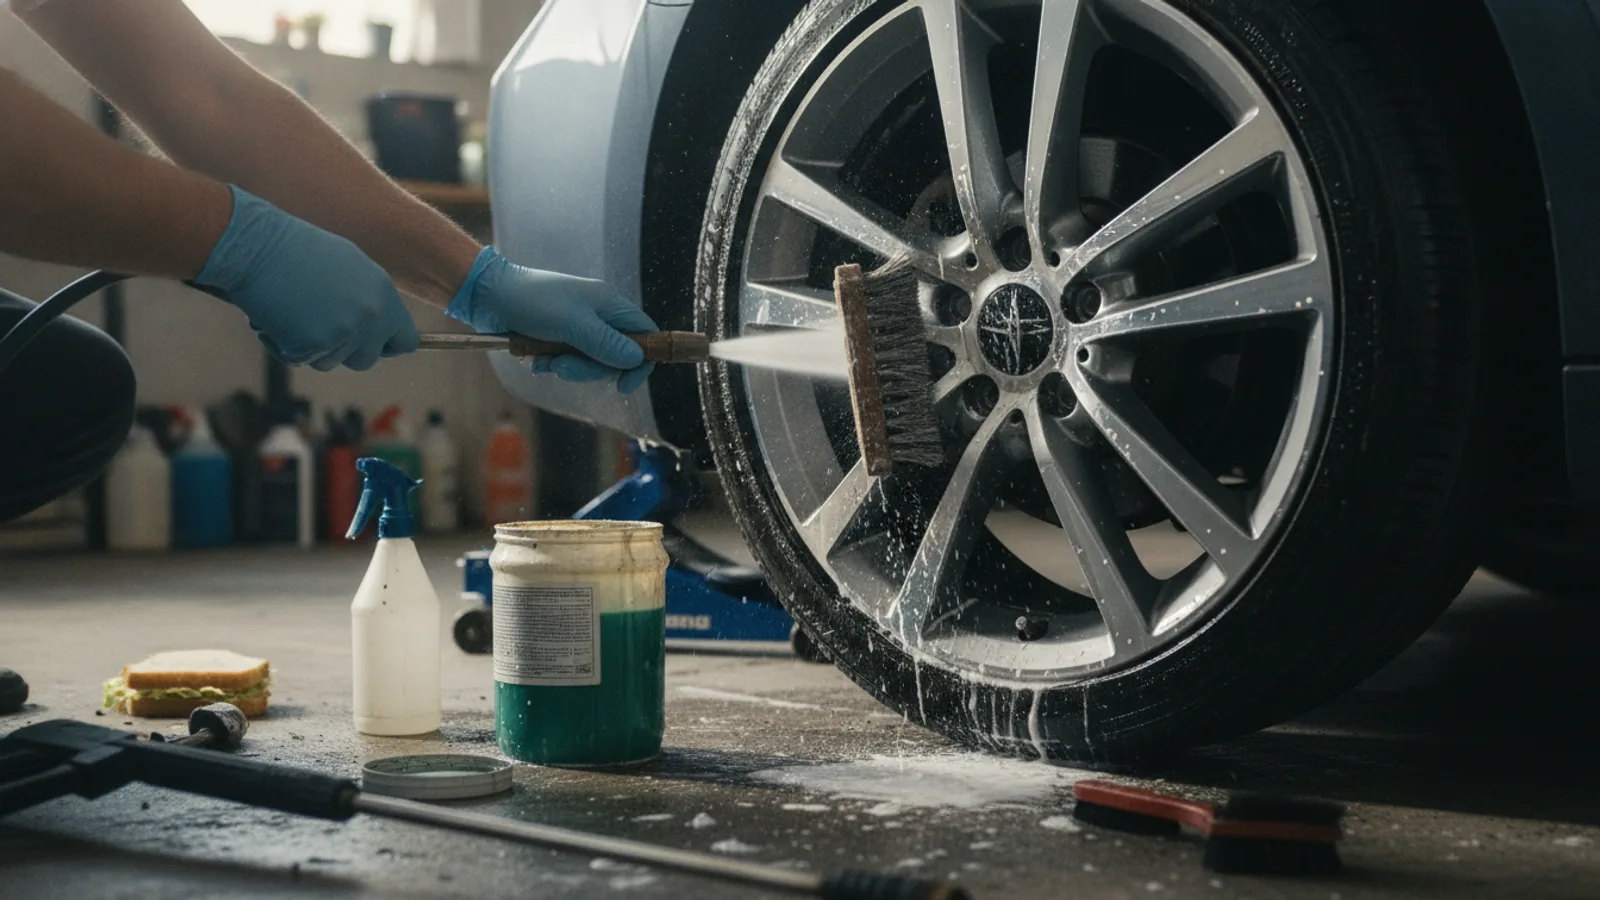
- Use pH-neutral, wheel-specific cleaners and separate soft brushes and mitts for wheels, never reusing them on paint to prevent cross-contamination and scratching.
Before You Start
- Gather dedicated wheel cleaning supplies: a pH-neutral wheel cleaner, a soft-bristled brush, a wheel woolie or mitt, a separate bucket, and microfiber towels. Never use household detergents or harsh acids.
- Wait until the wheels are cool, ideally after the car has been parked in shade for at least an hour. Hot brakes and rims make chemicals evaporate quickly and can cause spotting.
- Park on a level, shaded surface to prevent the cleaner from drying too fast, which can leave streaks or residue. Ensure you have access to a water source for rinsing.
- Remove any loose dirt or brake dust with a gentle pre-rinse using a hose or pressure washer on a low setting. This reduces the risk of scratching when you later agitate the surface.
Step-by-Step Instructions
Start with a cool and thorough rinse
Begin by ensuring the wheels are completely cool. If you've driven recently, wait at least an hour for the metal and brake components to reach ambient temperature. Then, using a hose with a spray nozzle or a pressure washer set to a gentle fan, rinse each wheel thoroughly. Aim to remove loose dirt, dust, and larger debris from the wheel face, barrel, and spokes. This initial rinse is crucial because dry wiping or applying a cleaner without rinsing can grind abrasive particles into the surface, causing micro-scratches. Pay special attention to the inner barrel and behind the spokes, as these areas collect the most brake dust. After rinsing, visually inspect the wheel for any stubborn deposits. If you see heavy buildup, you might consider a pre-soak with a foam or snow foam, but only if the wheel is cool. This step sets a clean foundation for the entire process, preventing the cleaner from merely moving dirt around rather than dissolving it.
Pre-soak with a wheel cleaner
Once the wheel is cool and rinsed, apply a wheel-specific cleaner that is pH-neutral and safe for your wheel type. Spray the product generously over the entire wheel surface, including the face, spokes, and barrel. Follow the manufacturer's instructions for dwell time, typically between one and three minutes. This pre-soak allows the chemicals to break down brake dust and road grime without you having to scrub aggressively. Avoid letting the cleaner dry on the wheel, as this can leave a residue or etch the clear coat. If you have particularly stubborn areas, you can spray a little extra cleaner on those spots. The key is to let the cleaner do the initial heavy lifting, which minimizes the need for physical agitation and reduces the risk of scratching. Always work on one wheel at a time to ensure the cleaner doesn't dry out before you rinse. Remember, consistency is better than overuse—more product doesn't always mean cleaner results.
Agitate with a dedicated brush and mitt
After letting the cleaner dwell, use a soft-bristled brush for the wheel face and a separate wheel woolie or mitt for the barrel and spokes. Start with the inner sections and work outward to avoid splashing cleaner onto already clean areas. Use gentle, circular motions to loosen any remaining dirt. Do not press hard. The brush's bristles are designed to reach into crevices, but forcing them can embed particles. Pay extra attention to the lug nut area and the corners of the spokes. If the wheel has intricate designs, switch to a detailing brush to tackle tight spaces. Periodically rinse the brush in a bucket of clean water to remove trapped grit that could scratch the wheel. This physical agitation is necessary because chemical cleaners alone may not dislodge all coating. Work efficiently but not hastily—you want to cover every square inch, but you also want to avoid letting the cleaner dry. After agitating, you should notice the brake dust and grime lifting away from the surface.
Rinse thoroughly from top to bottom
After agitating, rinse the wheel thoroughly with clean water, starting from the top and working your way down. This ensures that all loosened dirt and chemical residue are washed away from the wheel, not just redistributed. Use a strong enough spray to remove the foam and grime, but avoid directing a jet stream into the wheel bearing area or behind the brake caliper. Pay special attention to the cracks and crevices where cleaner might hide. A thorough rinse is essential because leftover cleaner can dry into a chalky residue or cause spotting. If you notice any remaining dirt streaks, you can spot-agitate with a separate mitt and then rinse again. It's often helpful to do a final rinse with a hose without a nozzle to let water flow naturally over the wheel, which helps dislodge any stubborn particles. After rinsing, check the wheel's surface by running a hand over it—it should feel smooth, with no gritty particles. This check ensures that the cleaning process has been effective.
Dry the wheel to prevent water spots
Immediately after rinsing, dry the wheel using a clean, soft microfiber towel. Start by drying the face and spokes, then move to the barrel and inner rim. Use a blotting motion rather than aggressive wiping to avoid pushing water into crevices that are hard to dry. Pay special attention to the lug nut recesses and the area around the valve stem. Water left on the wheel can contain minerals that, when evaporated, leave unsightly spots or etch the clear coat. Drying also prevents water from dripping onto the brake rotor and causing rust spots, although these are usually harmless and will wear off with braking. If the wheel has a matte finish, use a slightly damp towel to avoid streaks. For a thorough dry, you might use a second towel for the final pass. This step is often skipped, but it's crucial for achieving a clean, spot-free finish and maintaining the wheel's appearance.
Protect with a wax or sealant
Once the wheel is completely dry, apply a wheel wax, sealant, or ceramic coating to protect the surface and make future cleaning easier. These products repel brake dust and dirt, making them easier to rinse off. Apply a thin, even layer according to the product's instructions, usually with a clean applicator pad. Allow it to haze, then buff off with a microfiber cloth. Pay extra attention to the face and spokes, but don't neglect the barrel if you can reach it. This protection acts as a sacrificial layer, so the brake dust doesn't come into direct contact with the clear coat. Over time, the protective layer wears off, so you may need to reapply every few weeks or months, depending on your driving conditions. Waxing also gives the wheel a slick, glossy finish that enhances the appearance. Remember, protection is not just about looks—it helps preserve the wheel's structural integrity by preventing corrosion and pitting from acidic brake dust.
Quick Reference
| Situation | Action | Why it helps |
|---|---|---|
| Wheels are hot after driving and you want to clean them immediately | Wait at least an hour for wheels to cool completely before starting any cleaning. If you cannot wait, rinse with cool water to speed cooling, but do not apply any cleaning products until they are cool. | Cleaning products on hot wheels can cause chemical reactions that damage the clear coat or cause spotting and staining. |
| You notice heavy brake dust buildup on the rear wheels | Pre-soak the affected wheel with a pH-neutral wheel cleaner and let it dwell longer, up to five minutes, then agitate with a soft brush specifically for those areas. | Heavy buildup requires extra time for the cleaner to break down the dust, and gentle agitation helps lift it without scratching. |
| You are using a pressure washer to clean your wheels | Set the pressure washer to a low or fan setting, keep the nozzle at least twelve inches from the wheel, and avoid directing water at the wheel bearings, brake calipers, or tire pressure sensor valves. | High-pressure water can force moisture into sensitive components, causing damage or corrosion, and a fan spray spreads the force to prevent etching. |
Common Issues
- White powdery residue appears after cleaning: This is often caused by acidic cleaners reacting with wheel metal or leftover cleaning chemicals. Rinse the wheel thoroughly with clean water and use a pH-neutral cleaner. If residue persists, gently polish the area with a mild aluminum polish and repaint if necessary.
- Streaks or hologram marks on the wheel face: These are usually from using dirty or low-quality microfibers or applying too much product. Clean the wheel with a dedicated non-abrasive polish and use a clean, plush microfiber towel to buff. Work in straight lines rather than circles.
- Brake dust is stuck and won't come off: Use a clay bar or a specialized tar remover designed for wheels. Mist a lubricant (like a waterless wash) on the area and gently rub the clay bar over the surface until it feels smooth. Rinse and ensure the wheel is clean before protecting again.
Advanced Tips
- For enhanced protection, apply a ceramic coating specifically formulated for wheels, which bonds at a molecular level and provides long-lasting repellence to brake dust and road grime.
- Use a dedicated Wheel Shield or similar hydrophobic product that creates a sacrificial layer, making your next cleaning significantly faster and easier.
- If your wheels have a matte or satin finish, avoid waxes and sealants that contain oils, as they can leave a glossy patch. Instead, use a matte-safe cleaner and protectant.
Final Checklist
- Wheels are cool and parked in shade before cleaning.
- Gathered dedicated wheel cleaning supplies and avoided household detergents.
- Performed a pre-rinse to remove loose dirt, then applied pH-neutral cleaner.
- Agitated with a soft brush, rinsed thoroughly, dried with a clean microfiber, and applied a protective coat.
FAQ
Can I use dish soap to clean my alloy wheels?
No, dish soap is not recommended for alloy wheels. It can strip protective coatings and cause the finish to dull or corrode over time. Use a pH-balanced wheel cleaner that is specifically designed to break down brake dust without harming the wheel's clear coat or metal.
How often should I clean my alloy wheels?
The frequency depends on your driving conditions and brake pad type. As a general rule, clean your wheels every one to two weeks if you drive in urban areas where brake dust accumulates quickly. If you notice a brownish layer of dust, it's time to clean. Regular cleaning prevents buildup that is harder to remove later.
Is it safe to use a pressure washer on alloy wheels?
Yes, but with caution. Use a wide fan spray pattern and keep the nozzle at least twelve inches away from the wheel surface. Avoid directing water into the wheel bearing areas, brake calipers, or tire pressure sensors. Always check your vehicle manual for any specific recommendations.